저번 글에 이어 이번엔 JWT를 적용한 Auth 예제를 따라해보았다.
https://docs.nestjs.com/techniques/authentication#jwt-strategy
Documentation | NestJS - A progressive Node.js web framework
Nest is a framework for building efficient, scalable Node.js server-side applications. It uses progressive JavaScript, is built with TypeScript and combines elements of OOP (Object Oriented Progamming), FP (Functional Programming), and FRP (Functional Reac
docs.nestjs.com
내용대로 코드를 작성하면 아래와 같이 테스트 하라고 한다.

터미널에 curl localhost:3000/users 를 입력하면 401 에러가, 맨 아래와 같이 입력하면 성공했다는 메시지가 떠야 정상이다. 그런데 아무리 해도 두번째 명령어도 똑같이 401에러가 뜨는 것이었다.
며칠을 끙끙대다 결국 PM에게 물어보았다.
아, 이거 'TOKEN' 자리에 생성된 토큰을 대신 넣어야 되는 거예요.
...네????????????
아니....내가 저걸 보고 진짜 글자 그대로 'TOKEN' 이라고 쓰는지 실제 TOKEN을 넣는 건지 어떻게 알아요!!!!!!!! (왕초보의 절규)
다시 한번 느낀 공식 문서의 불친절함.......T.T
그리하여, 눈물을 머금고 일단 token 생성법을 찾아보았다. 다행히도 이 부분은 nestjs 깃허브에 sample로 등록되어 있다.
https://github.com/nestjs/nest/tree/09c9f704e5f5472f489e05528b0c88c6a771651a/sample/19-auth
nestjs/nest
A progressive Node.js framework for building efficient, scalable, and enterprise-grade server-side applications on top of TypeScript & JavaScript (ES6, ES7, ES8) 🚀 - nestjs/nest
github.com
- auth.service
import { Injectable } from '@nestjs/common';
import { UsersService } from '../users/users.service';
import { JwtPayload } from './interfaces/jwt-payload.interface';
import { JwtService } from '@nestjs/jwt';

@Injectable()
export class AuthService {
    constructor(
        private readonly usersService: UsersService,
        private readonly jwtService: JwtService,
    ) {}

	// createToken 메소드 추가
    async createToken() {
        const user: JwtPayload = { email: 'test@email.com' };
        const accessToken = this.jwtService.sign(user);
        return {
            expiresIn: 3600,
            accessToken,
        };
    }

    async validateUser(payload: JwtPayload): Promise<any> {
        return await this.usersService.findOneByEmail(payload.email);
    }

    async signIn(): Promise<string> {
        // In the real-world app you shouldn't expose this method publicly
        // instead, return a token once you verify user credentials
        const user: JwtPayload = { email: 'user@email.com' };
        return this.jwtService.sign(user);
    }

}
위의 깃헙 소스에 따라 token을 생성하는 메소드를 추가하고,
- auth.controller
import { Controller, Get } from '@nestjs/common';
import { AuthService } from './auth.service';

@Controller('auth')
export class AuthController {
    constructor(private readonly authService: AuthService) {}

    @Get('token')
    async createToken(): Promise<any> {
        return await this.authService.createToken();
    }

}
controller에서 사용할 수 있게 만들어줬다.
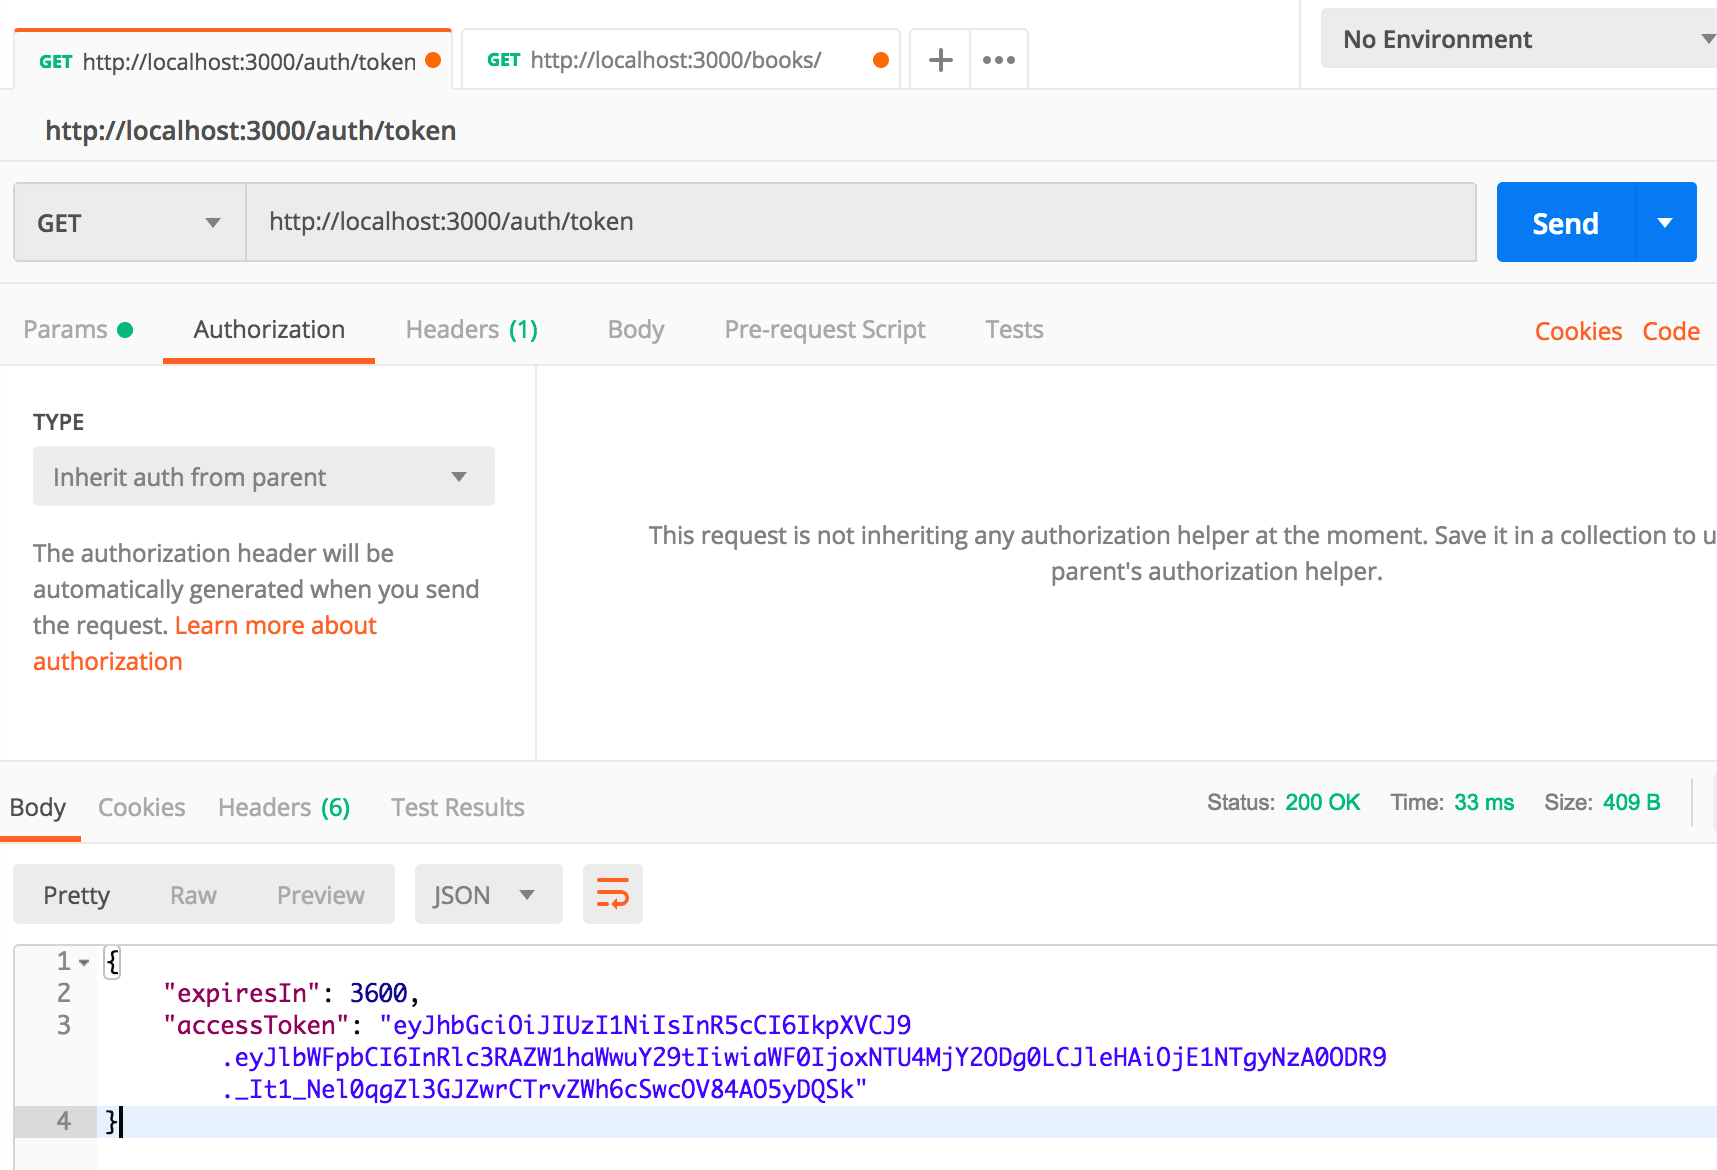
postman에서 auth/token으로 호출하니 accessToken의 이름으로 제대로 된 토큰을 응답받았다.
이제 이 토큰을 보내면 정상적으로 응답하는지 알아보자.
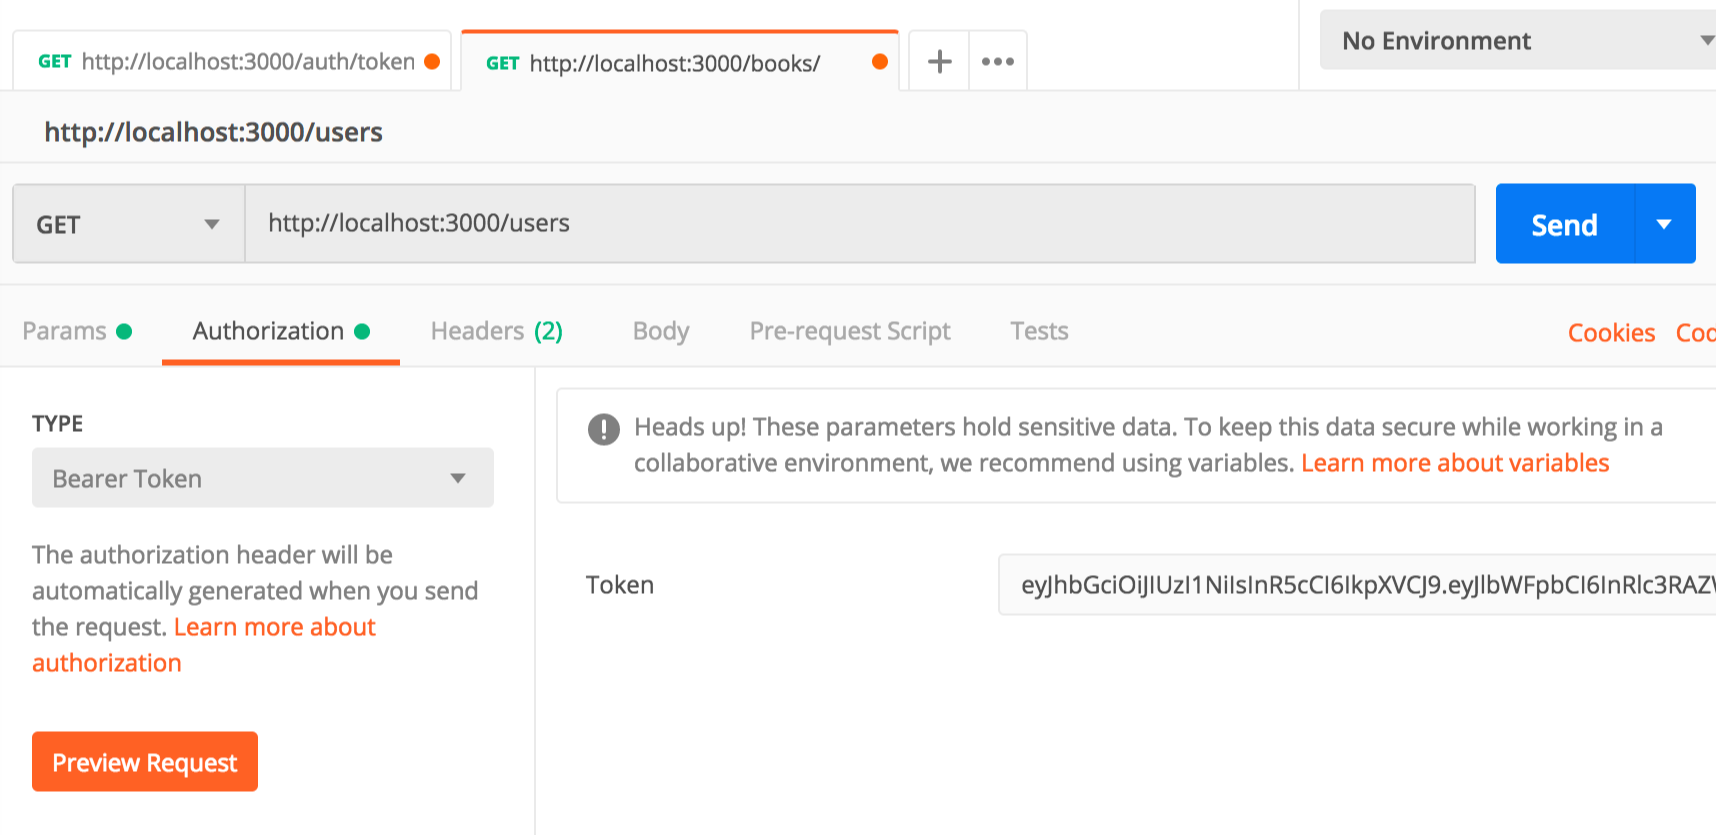
Authorization에서 Type을 Bearer Token으로 지정하고 내용에 아까 나왔던 token을 복붙한다. 그리고 Send 하면!!!!!!!!!
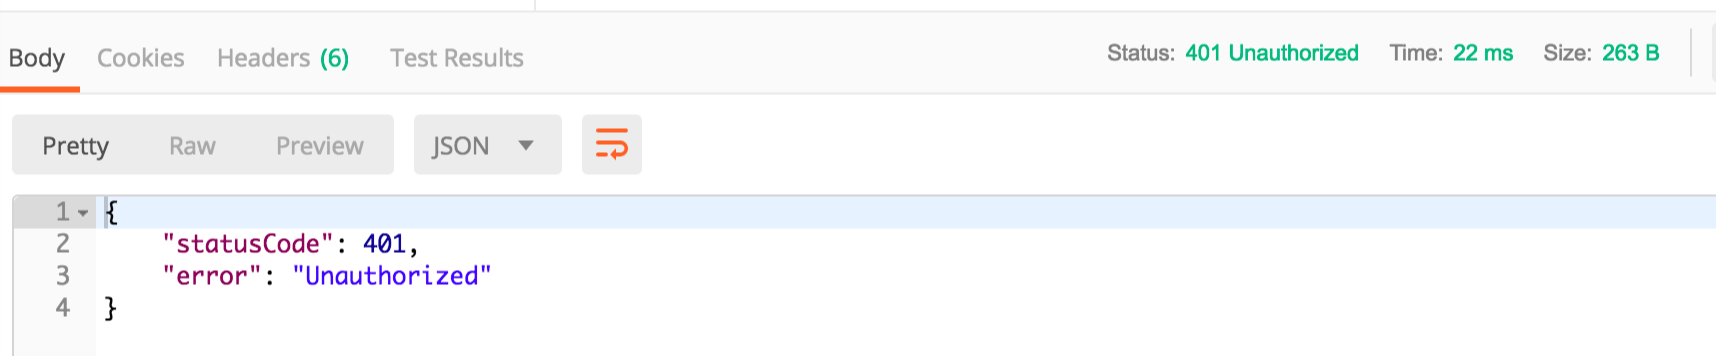
롸???????????..................
아니...내가 토큰 제대로 보내줬즈느..........(이악물)
이제 좀 풀리퀘 해보나 했는데...또 다시 팀원과 에러를 찾기 시작.
똑똑이 팀원 덕분에 드디어 해결되었다. 역시나 나의 멍충함 때문이었는데.........
- jwt.strategy
import { ExtractJwt, Strategy } from 'passport-jwt';
import { AuthService } from './auth.service';
import { PassportStrategy } from '@nestjs/passport';
import { Injectable, UnauthorizedException } from '@nestjs/common';
import { JwtPayload } from './interfaces/jwt-payload.interface';

@Injectable()
export class JwtStrategy extends PassportStrategy(Strategy) {
    constructor(private readonly authService: AuthService) {
        super({
            jwtFromRequest: ExtractJwt.fromAuthHeaderAsBearerToken(),
            secretOrKey: 'secretKey',
        });
    }

    async validate(payload: JwtPayload) {
        const user = await AuthService.validateUser(payload);
        if (!user) {
            throw new UnauthorizedException();
        }
        return user;
    }
}
validate 함수는 실제 user가 있는지 validateUser로 확인 후 없을 때 Exception 처리를 한다.
- auth.service
import { Injectable } from '@nestjs/common';
import { UsersService } from '../users/users.service';
import { JwtPayload } from './interfaces/jwt-payload.interface';
import { JwtService } from '@nestjs/jwt';

@Injectable()
export class AuthService {
    constructor(
        private readonly usersService: UsersService,
        private readonly jwtService: JwtService,
    ) {}

    async createToken() {
        const user: JwtPayload = { email: 'test@email.com' };
        const accessToken = this.jwtService.sign(user);
        return {
            expiresIn: 3600,
            accessToken,
        };
    }

	// 바로 이 부분!!!!!!!!!
    static async validateUser(payload: JwtPayload): Promise<any> {
        return await UsersService.findOneByEmail(payload.email);
    }

    async signIn(): Promise<string> {
        // In the real-world app you shouldn't expose this method publicly
        // instead, return a token once you verify user credentials
        const user: JwtPayload = { email: 'user@email.com' };
        return this.jwtService.sign(user);
    }

}
vaildateUser를 확인해보면 UsersService에 있는 findOneByEmail로부터 email 데이터를 확인하고 있다.
- users.service
import { Injectable } from '@nestjs/common';

@Injectable()
export class UsersService {
    findOneByEmail(email: string) {
    }
}
네...아무것도 없구요^^?
존재하는 데이터가 없으니 당연히 없는 user라고 판단하고 에러가 발생하는 것이었다....멍충멍충
- user.entity
export class UserEntity {

}
그래서 users 디렉토리에 아무것도 없는 UserEntity를 일단 만들어놓고,
- users.service
import { Injectable } from '@nestjs/common';
import { UserEntity } from './user.entity';

@Injectable()
export class UsersService {

    static findOneByEmail(email: string) {
        return new UserEntity();
    }
}
UserEntity 객체를 반환해서 사용자 데이터가 있는 것처럼 했다.
다시 아까처럼 postman으로 결과를 확인하면,
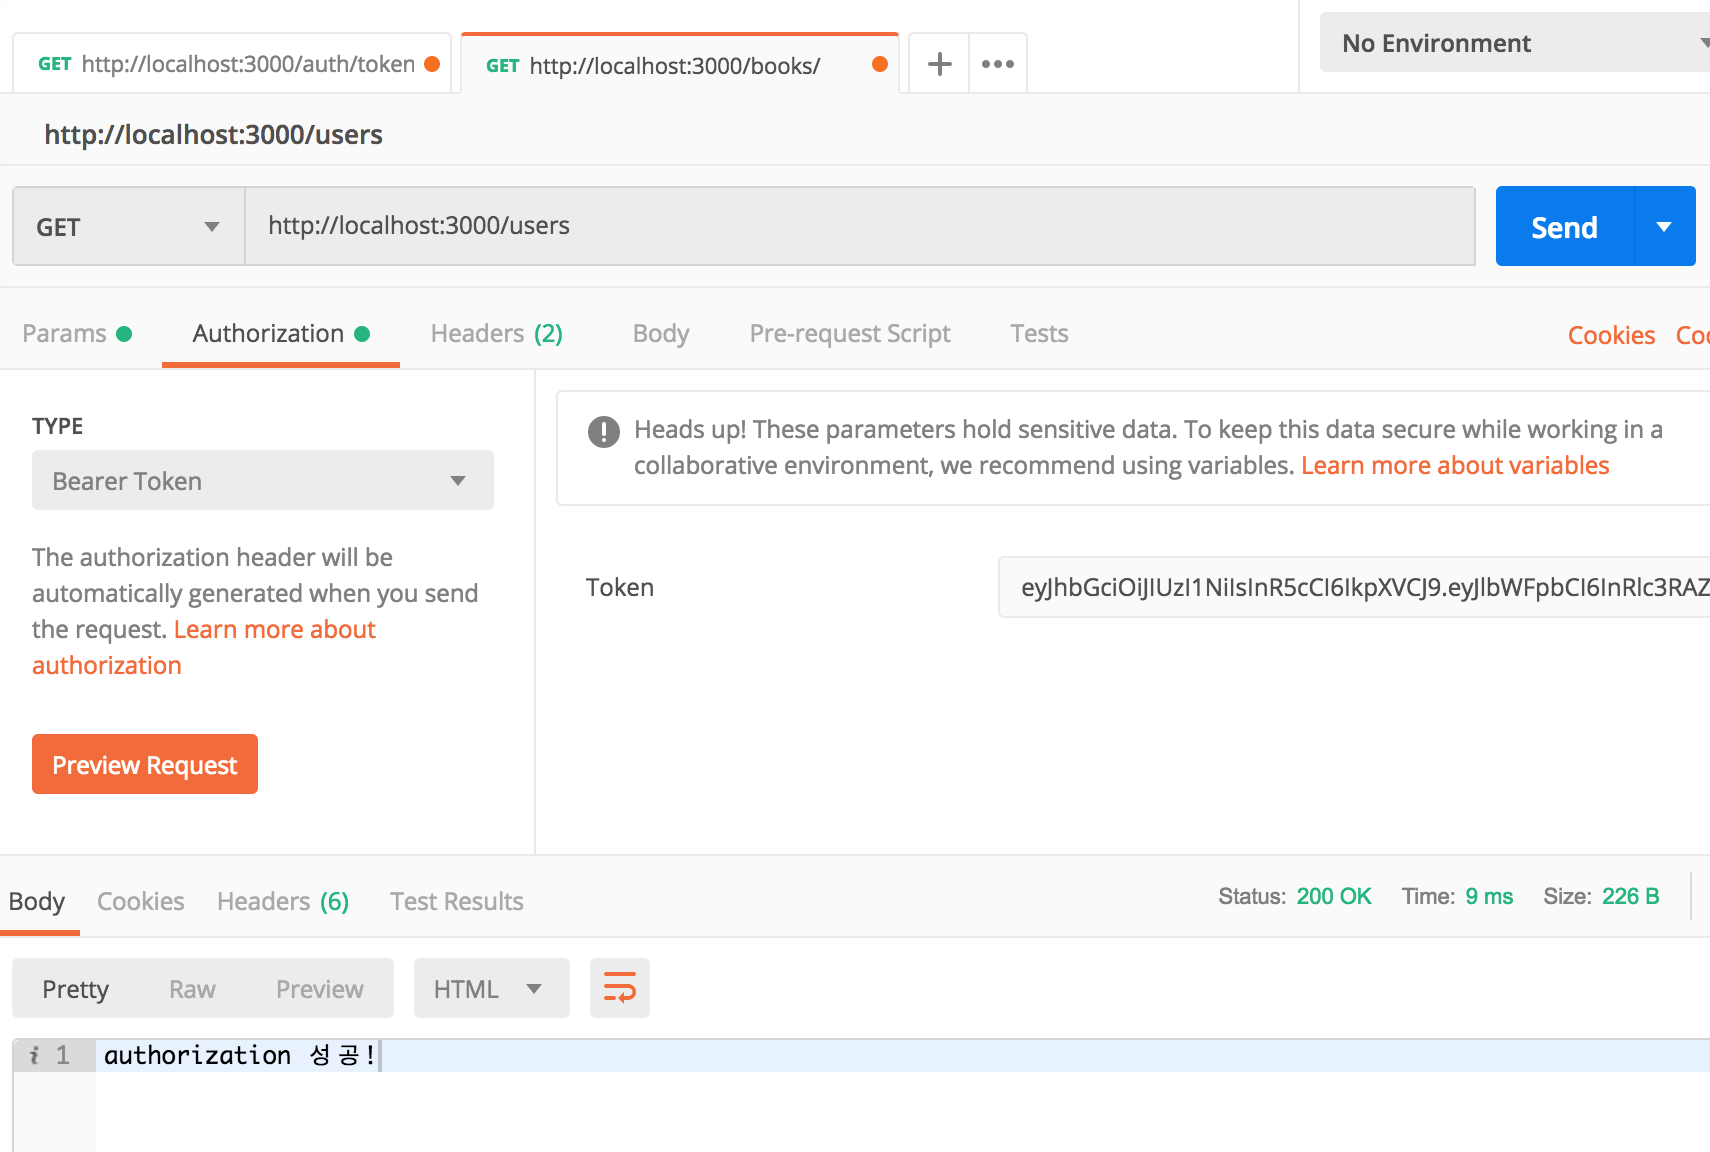
예이!!!!!!!!!!! (앗, 지금 보니 authentication인데 authorization이라고 했네)
여기까지 온 나새끼 정말 대견하고 리스펙.....장하다 도던~~~!! 그리고 도와준 팀원들도 리스펙...!!!!! 이분들이 없었다면 나는 진작에 포기했을 것 ㅠㅠ
그렇다고 pull request를 할 수 있었느냐? 안타깝게도 아니었다....이제 공포의 '테스트 코드' 관문이 남았다.
'개발새발 개발자 > JavaScript' 카테고리의 다른 글
| [NestJS] DI 처리 후 Module에 등록하기 (0) | 2019.07.01 |
|---|---|
| [NestJS] Promise 여부에 따른 test code에서의 throw 처리 방법 (0) | 2019.06.08 |
| [NestJs] Authentication 도전기 - 1 (feat.초보에겐 너무나 어려운 공식 문서) (2) | 2019.05.17 |
| [javascript] 스토리지 및 DOM 조작법 (0) | 2018.12.07 |
| [Vue.js] router 정보 보기 (0) | 2018.12.07 |

